Force carbonation is the process of carbonating a beverage (e.g. beer) using a CO2 tank. For me, this is one of the main benefits of kegging over bottling, as it can be much faster than natural carbonation, the method used for carbonating bottled beer.
From what I can tell, everyone has his/her own method to force carbonate beer. But at the end of the day, they all involve applying some CO2 pressure to the keg and some amount of shaking (a lot to none) to speed up the process. Ultimately, you want the batch to achieve equilibrium with some CO2 pressure level (according to the CO2 table) without over carbonating, so in theory, any method can work as long as you are careful not to over carbonate.
The method I've tried and found to work well is the following.
1. After filling the keg and purging the air in the head space, place in fridge to chill over night. Hook up the CO2 if you want, it can only help speed up the process.
2. Next day, with the CO2 attached and set to the desired pressure according to the CO2 table, roll the keg back and forth. As you roll, keep the CO2 line on the bottom, so you can hear the bubbling inside the keg. After 15-20 minutes, the bubbling will stop no matter how much more you roll. The beer is now carbonated, but it is rather foamy.
3. Allow the beer to settle for a few hours and enjoy.
I like this method because the shaking (or rolling) takes place at the target pressure, so you can't over carbonate the beer. It also doesn't take much more time than what it takes to chill the beer. Many other methods call for carbonating at a high pressure (30-60 PSI) to speed up the carbonation process. That might save you a few minutes (or not), but you run the risk of over carbonating.
Tuesday, June 28, 2011
Kegerator conversion of Danby mini-fridge
When I built my outdoor kitchen, I debated between putting in a kegerator versus a fridge. I opted for a fridge thinking it would be more practical, and I hadn't started home brewing at that time. Since then, I began home brewing, and we hardly ever use the fridge because the main kitchen is not far away. So I looked into converting the fridge into a kegerator. At first, I was discourage by how little space is inside the fridge. It seemed I would not be able to fit even one 5-gallon corny keg and I would have to resort to smaller kegs. I regretted not going with a kegerator from the very start. Then I found this guy who had converted a very similar fridge (Danby DAR440BL) into a kegerator that fits two corny kegs and a 5lb CO2 tank (the key to getting enough space was removing the storage panel on the door).
I want to share a little about this project because I know how immensely useful this guy's project and his pictures were to me. I hope others will find this useful as well.
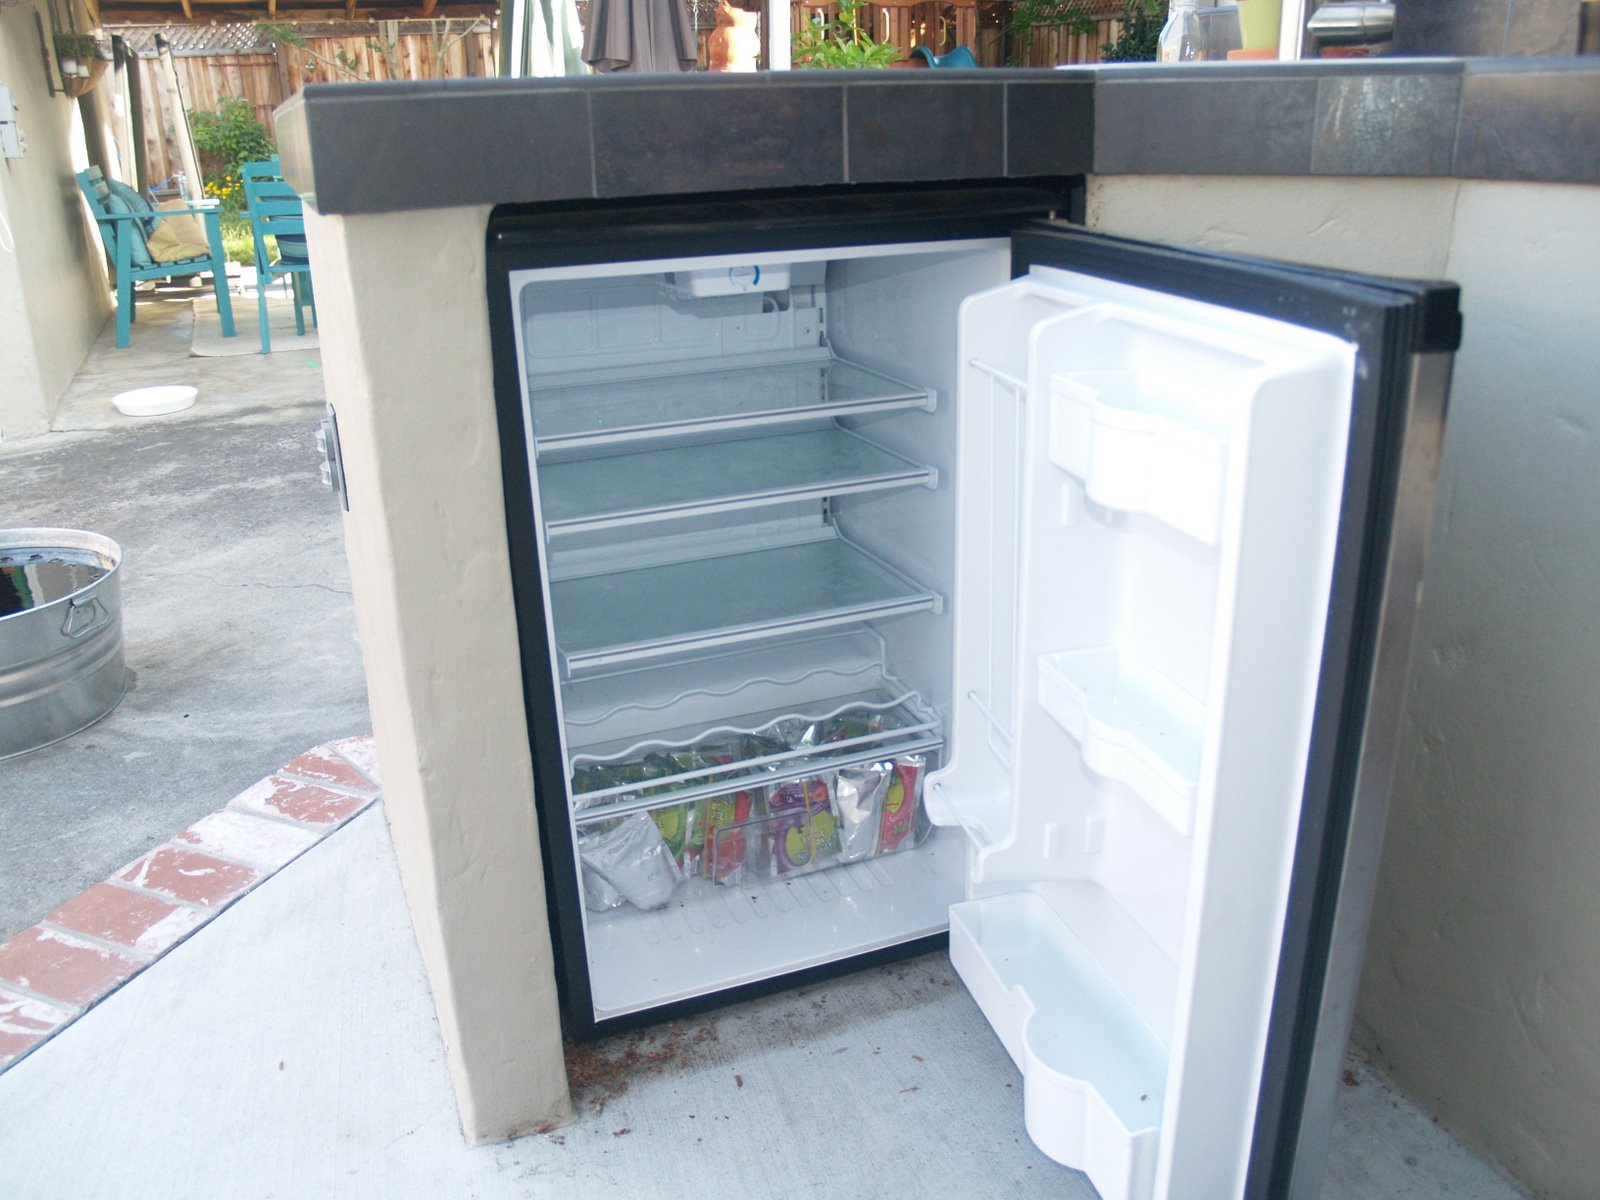
Here's the original fridge in my simple outdoor kitchen. It is a Danby DAR482BLS, which can be commonly found for under $200. It is not intended for outdoor use, but when shopping for outdoor kitchen, quite a few contractors recommended its use over much more expensive outdoor fridges. So far, it's working just fine.


Here's the finished product. It was not difficult to make the conversion. I bought all the kegerator conversion equipment from http://www.beveragefactory.com. The kegs were used soda kegs found at a local brew shop.

Monday, June 20, 2011

How to Sanitize Your Corny Keg
How to Sanitize Your Corny Keg
All Cornelius kegs need to be sanitized before use. Many sanitizing solutions are available, but my personal choice is StarSan. It is easy to use and requires no rinsing saving time with your kegging adventures.
Step one will be to bleed the pressure off the corny keg. This will allow you to remove the cap. To relieve the pressure pull up on the relief valve. If your keg is not equipped with one you can push down on the center of the gas (IN) connector on your Cornelius keg. Either way you relieve the pressure hold a rag over the valve or connector to prevent getting any liquid on you. Sometimes it happens.
After the pressure is gone, pull up on the cap locking handle. Hold the handle @ 90 degrees from the cap and strike it with the palm of your hand or rubber hammer. Once the cap is loose lower it into the keg and twist to allow clearance to remove it from the corny keg.
Add about a gallon of water to the keg and reinstall the cap. Pick the keg up and shake it up abit. Remove the cap and dump the water out. Do this a couple of times to make sure your keg is totally clean.
Now mix up a couple gallons of your favorite sanitizer in a clean container. Remove the cap and drop into sanitizer. Take about one gallon of the sanitizer and put it in your Cornelius keg. Put the cap back on the keg and pressurize to about 10 psi. or higher until the cap is sealed. This may take up to 30 psi in some cases. Shake the keg up to coat the entire inside of the keg. Install the tap to the keg and let the sanitizer flow out the tap until empty. Remove the Co2 and let the pressure bleed out thru the tap. If you are going to store the corny keg for a while, leave the pressure in it to keep any bacteria from getting in your keg.
Following these steps will ensure your success in successful storage of beer without any problems.
http://www.cornykeg.com/store.asp?pid=29967
Root beer kegging notes
Some notes found on the interweb about kegging and force carbonating root beer. Planning to try the first method tonight because it's the fastest.
=======================
Nearly Instant Soda (about 10 minutes)
Put in keg
6-7 pounds of ice
soda & sugar
water to fill
CO2 35 psi
shake until the ice cubes have melted and/or the regulator has stopped squealing.
http://www.homebrewtalk.com/f95/root-beer-how-force-carb-77789/index3.html
=======================
I've been making sodas (including root beer) for a few years now. I've found that a CO2 volume of at least 3.0 produces a very desirable foamy head in root beer and appropriate "zing" in other sodas. Anything below that leaves the soda tasting weak. I carbonate in tank, using a carb stone, chill the tank to at least 33F (careful you don't freeze it, no alcohol to act as a buffer), and keep the head pressure of the tank around 15psi. Works great!
http://www.probrewer.com/vbulletin/showthread.php?t=7443
=======================
Nearly Instant Soda (about 10 minutes)
Put in keg
6-7 pounds of ice
soda & sugar
water to fill
CO2 35 psi
shake until the ice cubes have melted and/or the regulator has stopped squealing.
http://www.homebrewtalk.com/f95/root-beer-how-force-carb-77789/index3.html
=======================
I've been making sodas (including root beer) for a few years now. I've found that a CO2 volume of at least 3.0 produces a very desirable foamy head in root beer and appropriate "zing" in other sodas. Anything below that leaves the soda tasting weak. I carbonate in tank, using a carb stone, chill the tank to at least 33F (careful you don't freeze it, no alcohol to act as a buffer), and keep the head pressure of the tank around 15psi. Works great!
http://www.probrewer.com/vbulletin/showthread.php?t=7443
Subscribe to:
Comments (Atom)